How-To Guide for Doctors
This guide explains how doctors can use the TeddyCare application to scan, generate, and approve AI-generated x-rays for stuffed animal patients. It covers everything from preparing your setup to approving results and viewing x-ray slides.
For Doctors
As a doctor, you can “x-ray” teddybears and other stuffed animals using a camera connected to the computer. Additionally, you can introduce simulated “breaks” into the generated x-rays for realism. All x-rays approved by the doctor can later be retrieved by the patient’s owner using a QR code.
Before Receiving Patients
Before you start receiving patients, check the following to ensure smooth operation of the application:
Make sure you can connect to the website running the application.
Verify that the computer has a working webcam.
If you have trouble reaching the website or encounter any errors, contact your system administrator for assistance.
Note
We recommend testing both the internet connection and camera before the first patient arrives.
Generating QR Codes
Similar to real hospitals, each patient needs a unique identifier. In this case, the identifier is a QR code.
To generate QR codes:
Open the Admin page.
Set the desired number of QR codes to generate.
Click Generate (this may take some time).
Once generation is complete, a PDF containing the QR codes will automatically download.
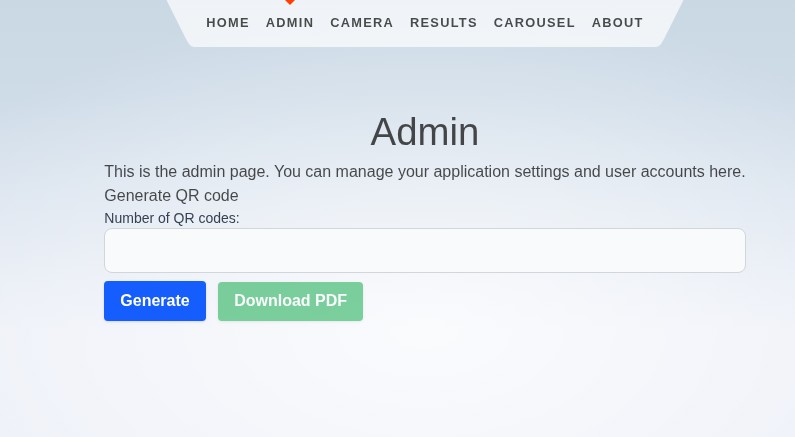
We recommend printing the QR codes on adhesive paper and attaching them to something the patient owner will not easily lose (for example, a flyer).
Important
Make sure to generate and print QR codes in advance. QR codes are required when scanning a patient.
Scanning a Patient
To scan a patient, you need:
The patient’s QR code
The type of animal
The name of the owner and patient
The animal type helps the AI model better understand what it’s analyzing. If the type is unclear or not listed, select Other.
To start scanning:
Go to the Camera page.
Start the QR Scanner.
Hold the patient’s QR code in front of the camera — it should automatically be detected.
Fill in the patient details.
Start the camera feed.
Take a picture of the patient.
If necessary, retake the picture.
Click Upload to submit the final image.
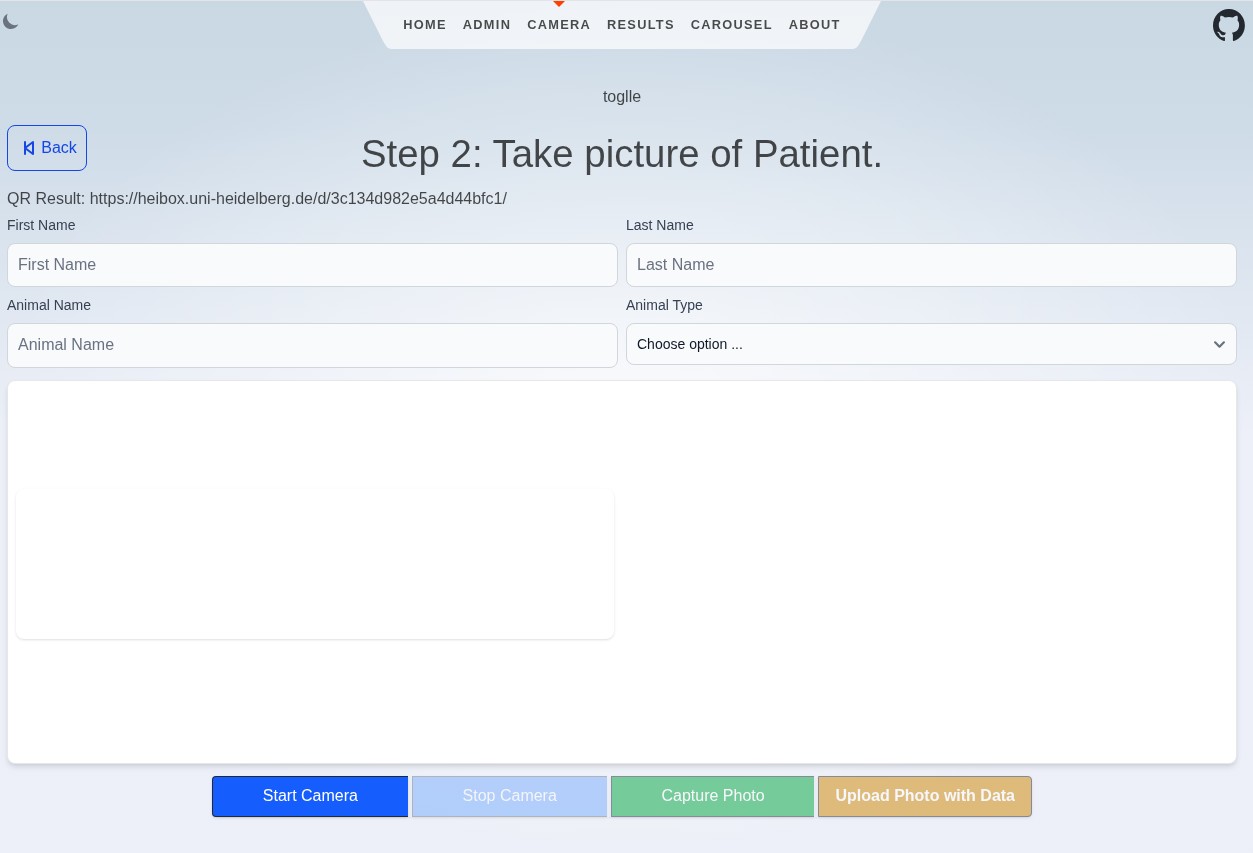
Once the camera page is open, the scanner will automatically detect any visible QR code and move to the next step. Only the most recent photo will be uploaded for processing.
Tip
Ensure the patient is well-lit and centered before taking the photo for best AI results.
Approving X-Rays
Because the application uses AI to generate x-rays, the results may not always be perfect. A doctor’s review and approval are required before any x-ray is stored and made available to the owner.
To approve or reject generated x-rays:
Go to the Results page.
Review the generated x-rays displayed in rows.
Approve the best image using the green button, or reject all of them using the red button.
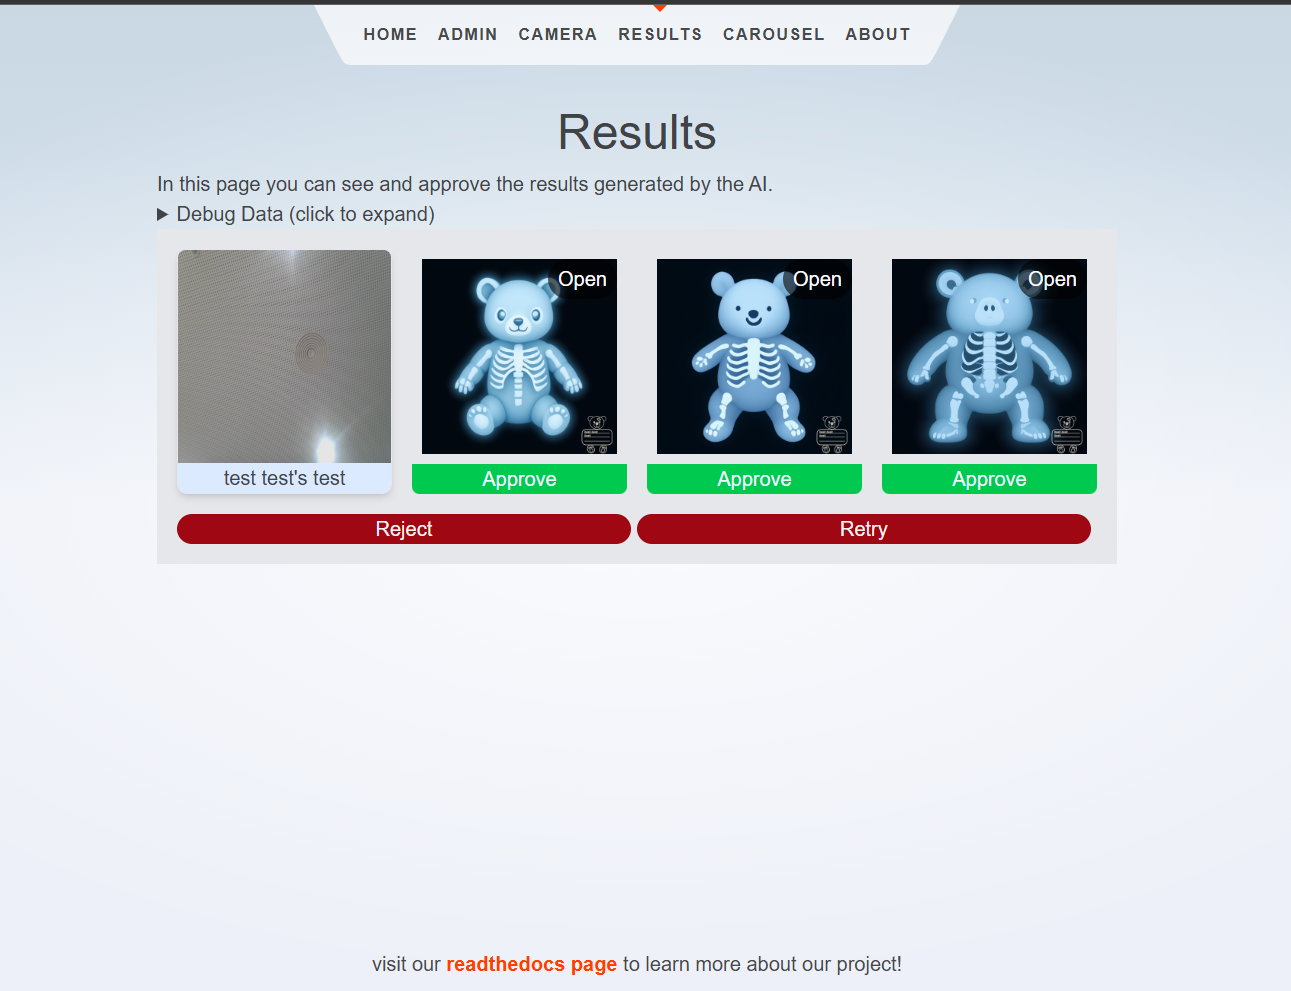
Each row represents the x-rays generated from a single uploaded image. If all are rejected, the AI model will try again and send new x-rays until one is approved. Once an image is approved, it is uploaded — along with the original photo — for later retrieval.
Note
Approved x-rays are stored securely and can be accessed by the patient owner via their QR code.
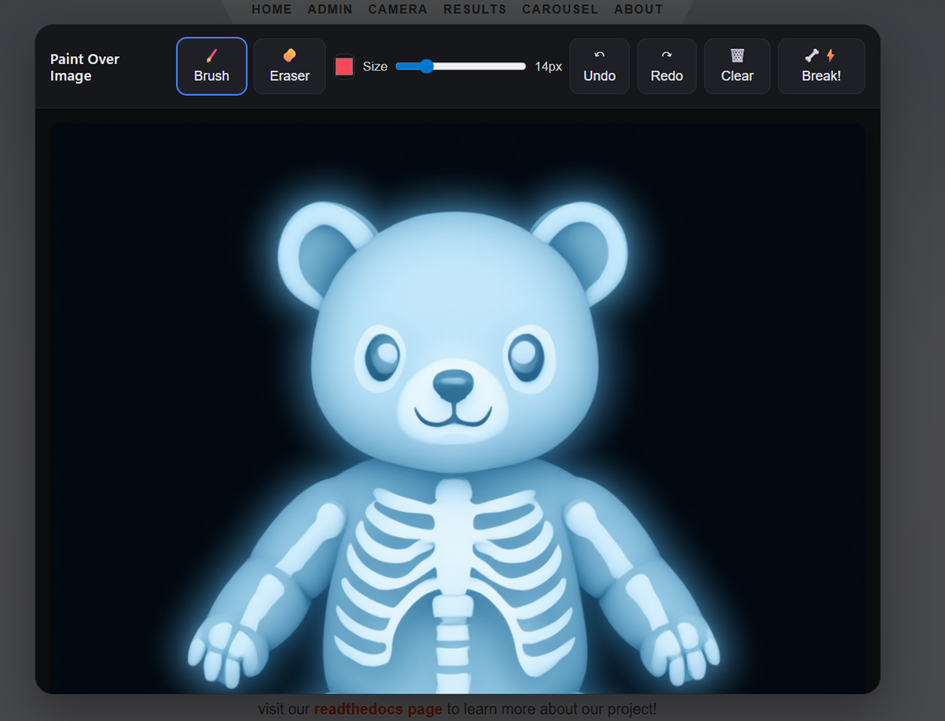
Breaking Bones
If you wish to have a broken bone in your diagnosis, you can paint one in.
To break a bone:
While in the Results page, before approving an x-ray, click on Open on the desired image.
Use the drawing tools to paint a simulated break directly onto the x-ray image.
Once satisfied, click on Break! and review the result.
Approve the modified x-ray as usual.
Tip
Use the eraser tool and undo to remove any mistakes you made.
Viewing Recent X-Rays (Carousel)
To view recently approved x-rays, open the Carousel page. Here, you can:
Cycle through recently approved x-rays (automatically or manually).
View a fullscreen slideshow of recent results.
Toggle between showing x-rays and original images side-by-side.
All settings are available at the top of the page:
Autoplay: Automatically cycles through the images.
Visible: Adjust how many images are displayed on screen at once.
Show Original: Toggle to show the original alongside the x-ray.
Fullscreen: View one image at a time in fullscreen mode (press Esc to exit).

Tip
Use the left and right arrow buttons to manually navigate through the images.